


How to Replace the Packing of a Gate Valve?
As a reputable gate valves supplier, I've witnessed firsthand the importance of maintaining gate valves to ensure their optimal performance. One common maintenance task that often comes up is replacing the packing of a gate valve. In this blog post, I'll guide you through the process of replacing the packing of a gate valve, providing you with the knowledge and confidence to tackle this task effectively.
Understanding the Role of Packing in a Gate Valve
Before we dive into the replacement process, let's first understand the role of packing in a gate valve. The packing is a sealing material located around the valve stem, preventing the leakage of fluid from the valve body. Over time, the packing can wear out due to factors such as friction, pressure, and temperature changes, leading to leaks. Replacing the packing is a crucial maintenance step to prevent fluid loss, maintain system efficiency, and ensure the safety of your operations.
Tools and Materials You'll Need
To replace the packing of a gate valve, you'll need the following tools and materials:
- Adjustable wrench: To loosen and tighten the gland nut.
- Screwdriver: To remove any screws or bolts holding the gland flange in place.
- Packing removal tool: This can be a simple flat - tip screwdriver or a specialized packing removal tool to extract the old packing.
- New packing material: There are various types of packing materials available, such as graphite, PTFE, or asbestos - free fibrous materials. Choose a packing material that is compatible with the fluid, pressure, and temperature conditions of your application.
- Lubricant: A suitable lubricant, such as silicone or graphite grease, to ease the installation of the new packing.
Step - by - Step Guide to Replacing the Packing
- Isolate the Valve:
- First and foremost, shut off the flow of fluid through the gate valve. This may involve closing upstream and downstream valves or shutting down the entire system.
- Release the pressure in the valve by opening a small drain valve or bleeder valve, if available.
- Remove the Gland Flange or Gland Nut:
- Use an adjustable wrench or screwdriver to remove the gland nut or any screws/bolts holding the gland flange in place. The gland flange is located on top of the valve bonnet and compresses the packing around the valve stem.
- Once the gland nut or flange is removed, set it aside carefully.
- Remove the Old Packing:
- Insert the packing removal tool into the packing cavity and gently pry out the old packing. Work your way around the cavity, removing all the old packing material.
- Be careful not to damage the valve stem or the packing cavity during this process.
- Clean the Packing Cavity and Valve Stem:
- Use a clean cloth or brush to remove any debris, dirt, or old packing residue from the packing cavity and the valve stem.
- Inspect the valve stem for any signs of wear, corrosion, or damage. If the stem is damaged, it may need to be repaired or replaced before installing the new packing.
- Lubricate the New Packing:
- Apply a thin layer of lubricant to the new packing material. This will make it easier to install and help it form a better seal.
- Install the New Packing:
- Cut the new packing material to the appropriate length. The packing should be cut in a diagonal or "V" shape to ensure a proper fit around the valve stem.
- Start inserting the packing into the packing cavity, one ring at a time. Make sure each ring is seated evenly and tightly against the previous one.
- As you insert the packing, rotate the valve stem slightly to ensure that the packing is evenly distributed around the stem.
- Reinstall the Gland Flange or Gland Nut:
- Once all the new packing has been installed, place the gland flange or gland nut back in position.
- Tighten the gland nut or bolts gradually and evenly, using an adjustable wrench. Do not over - tighten the gland nut, as this can damage the packing and the valve stem.
- Test the Valve:
- Slowly open the valve to allow fluid to flow through it. Check for any signs of leakage around the valve stem.
- If there are no leaks, the packing replacement was successful. If there are still leaks, you may need to adjust the gland nut or check for any installation errors.
Types of Gate Valves and Their Packing Considerations
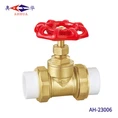
We offer a wide range of gate valves, each with its own unique packing requirements. For example, our PPR Brass Gate Valve is commonly used in plumbing systems. When replacing the packing of this type of valve, it's important to choose a packing material that is compatible with water and the relatively low - pressure environment of plumbing applications.
Our Water Meter Gate Valve is specifically designed for use with water meters. The packing in this valve needs to be able to withstand the constant flow of water and the pressure fluctuations associated with water meter operations.
The Brass Gate Valve with Lock is often used in applications where security is a concern. When replacing the packing of this valve, ensure that the new packing does not interfere with the locking mechanism.


Troubleshooting Common Issues
- Leakage after packing replacement: If the valve is still leaking after replacing the packing, it could be due to improper installation of the packing, over - or under - tightening of the gland nut, or damage to the valve stem. Check the installation, adjust the gland nut, or inspect the valve stem for damage.
- Difficulty turning the valve stem: If the valve stem is difficult to turn after packing replacement, it may be because the packing is too tight. Loosen the gland nut slightly and test the valve again.
Conclusion
Replacing the packing of a gate valve is a relatively straightforward maintenance task that can significantly extend the life of your valve and prevent costly leaks. By following the steps outlined in this blog post and choosing the right packing material for your application, you can ensure that your gate valve operates smoothly and efficiently.
If you're in need of high - quality gate valves or packing materials, we're here to help. As a trusted gate valves supplier, we offer a wide range of products to meet your specific needs. Whether you're working on a small plumbing project or a large industrial application, we have the expertise and products to support you. Contact us today to discuss your requirements and start a procurement negotiation.
References
- Valve Handbook, Valve Manufacturers Association
- Industrial Valve Maintenance Manual, various industry publications.